 Help Center
With the Misc panel in the Authoring Tool, you can further customize the Steps of your Walkthroughs.
With the Misc panel, you can:
- Delay the appearance of a Step for a certain time
- Redirect a user to a certain URL when a Step starts
- Change the Width of popovers
- Adjust the position of popovers from back to front and reverse
- Make a specific Step the final Step of a Walkthrough, Tooltip, Feedback or NPS Topics for Analytics
- Make a Step persistent
In this article, we will explain the functions of the Misc panel.
Opening the Misc panel
The Misc panel appears in the Authoring Tool when you create and edit the Steps of your Walkthroughs and Launchers. In this article, we'll be editing Steps that are already part of a Walkthrough. If you haven't created a Walkthrough yet, check our Walkthroughs article first.
To open the Misc panel:
In the Authoring Tool, while viewing a Walkthrough, select a Step or click the + button to create a new one.
Scroll down and expand the Misc panel:

Functionalities of the Misc panel
With the Misc panel, you can set the following:
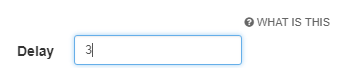
- Delay - Used to delay the appearance of a Step for a certain duration (in seconds). For example, entering "3" will delay the Step's appearance for 3 seconds.
- Path - This lets you redirect users to a specified URL when a Step is started. This is available for Walkthroughs only. (Want to be sure your Walkthrough always starts from a specific URL? Check out our guide How to: make a walkthrough always start from a certain url.)

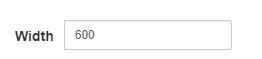
- Width - Used to change the width of a popover (in pixels). Height is set automatically based on the Step's content.
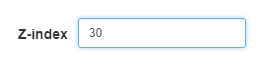
- Z-Index - Changing the value of the Z-index will change the Z-position of the Step. An increased value will move it in front of other on-screen elements while decreasing the value will move it behind. The Z-index value of a Step starts at 22. Therefore, if you enter ten into the field, it results in a Z-index of 32. This is because of the various layers within the Player and to ensure they don't overlap.
- End step - This setting marks a particular Step as a finish or endpoint. This is available for Walkthroughs, Tooltips, Feedback and NPS Topics. This is especially useful if you want the Topic to be marked "Completed" in Analytics even if the user hasn’t technically reached the last Step.

- Persistent step - The option for persistent Step allows you to indicate if a Step will continue to display even when a user reloads the page or navigates your application. Read more about persistent Steps in our guide.
Relative vs Absolute Paths
The path you add in the Misc panel can be relative or absolute, and you can choose which one to use. Here's the difference:
Absolute Path is the full path of your site. We recommend using this path if you want a specific Step to launch in an exact URL.
Relative Path, on the other hand, is used when you have multiple Sites. Let’s say your Site has both a development version and a production version. In this case, your development URL is dev.example.com. If you are doing a tutorial on the development version and you used an absolute path such as dev.example.com/dashboard, it would cause a problem. Once the topic is updated in the production version, users will still be redirected to dev.example.com/dashboard. Instead, using a relative path (“dashboard”) will give you the flexibility of playing the Topic on the right path without checking the domain.
When to use the End step option?
When it comes to Analytics, some of the most important data you'll want is whether or not users have finished a particular Walkthrough. Sometimes, you may use Triggers to allow your users to choose from multiple options. When you do this, it may be that two Steps in your Walkthrough are potential endpoints you'd like to track. Therefore, you can specify a Step as an "End step", and if the user reaches it, the Walkthrough will be marked as finished. See more about using multiple Triggers.