 Help Center
In this tutorial, we'll build a step-by-step walkthrough available as a topic in your widget.
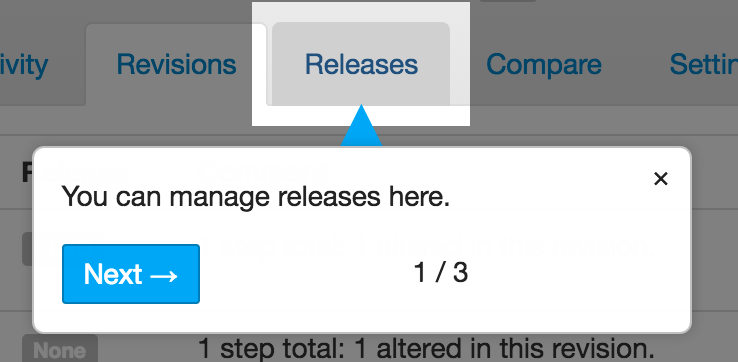
Create the Walkthrough
- Create a new topic and select Walkthrough as the type, which will start with all the defaults of a step-by-step tour.
- Leave the topic visible in the widget.
- Click Create topic.
Create the step
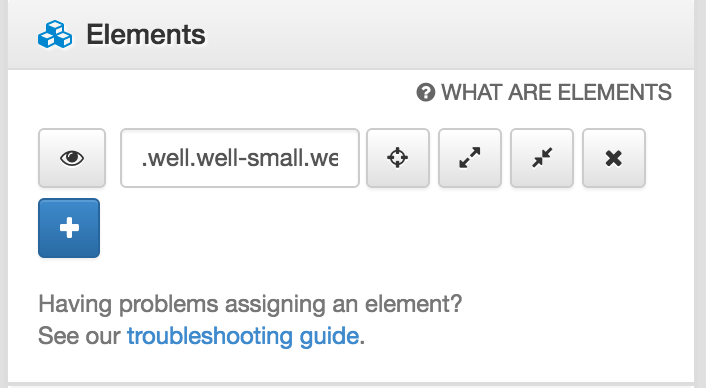
- Add a step
- Under Elements, scroll down to select the element(s) you want to highlight.
Configure the step
Under Step options:
- Change positioning - Inline Manual will choose a suitable default position for your step, but you can also position it where it suits you.

- Enable the Next button - with this button. Users can advance through the steps of a Walkthrough when they click on it.

- Under Backdrop - enable both the Backdrop and the Cover.
- The backdrop darkens the area around a selected element. The cover locks down the click-through tour so they don't get lost or distracted.

- The backdrop darkens the area around a selected element. The cover locks down the click-through tour so they don't get lost or distracted.
Under Misc:
- If you need to redirect users to a specific location for a step, you can set this by navigating to where you want them to go and choosing the Get path to fill in the current URL.
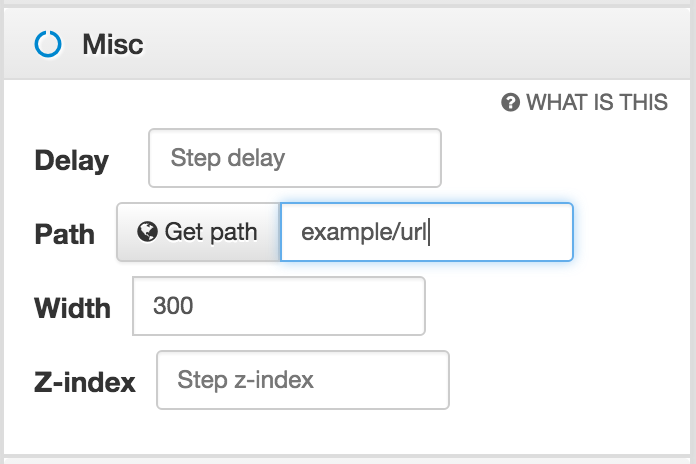
- If you need to redirect users to a specific location for a step, you can set this by navigating to where you want them to go and choosing the Get path to fill in the current URL.

- Find out more about Redirects.
Add more steps
- Follow the instructions above to add as many steps as needed.
- For your final step, you can use the End button instead of the Next button. With the End button, users can close and finalize the Walkthrough or tour. That is why it is recommended to use this button in the final step.
Tip: Show more with embedded media
Sometimes you may need to show a feature that is not available to a user's current access level or current state. An excellent way to show them would be to embed media, such as a video or a slideshow, as a final step on your tour.
- Images
- A screenshot or an animated gif.
- A video
- A slideshow
- Use iFrames to embed a Slideshare or other application. Tip: On Slideshare, you can set the size of the slideshow. You can match the width in the Misc options of your step.